Every BLS+, car, wheelchair, gurney, labs, and telemedicine call requires an EMS chart composed using AngelTrack's PCR.
For fire (NFIRS) calls, the PCR will switch to its fire layout; to learn how to complete a fire report, read the Fire Report Writing Guide. Likewise for fire inspection calls, the PCR will switch to its fire inspection layout; to learn how to use it, read the Fire Inspection Guide.
Open the PCR
While in the middle of running a call, you can open the PCR right from the Run Call page. The PCR will be set for the current call.
You can also open the PCR for other (older) dispatches, even if you are currently running a call. The Crew Home page's list of "Recent Calls" has links to open the PCR for any of your recent dispatches. And the Run Call page includes a column of links to "Reports Waiting"; each link leads to an unfinished PCR.
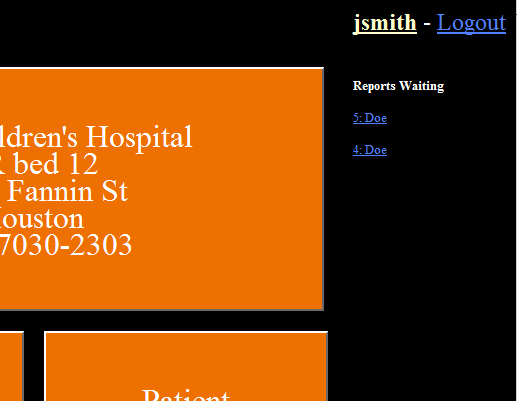
Two reports, both for John Doe, are awaiting completion.
Navigate the PCR
The PCR's ribbon provides access to all pages within, with buttons grouped by function. Here is the ribbon for an EMS, car, or wheelchair call:

There is a different ribbon for fire (NFIRS) calls, and for fire inspection calls.
PCR Guide Colors
The PCR buttons change colors to show which required elements of the report are missing:
- Bright yellow means the section is definitely needed in order to complete the run report for the respective dispatch.
- Dark yellow means the section is probably needed for a the run report... but you can send the report to QA without it.
- Normal blue for all other tabs.
The yellow coloration is controlled by the Patient Disposition field on the Followup page: the recordkeeping requirements depend entirely on what was ultimately done to the patient, so some tabs will not turn yellow until the Patient Disposition is set.

AngelTrack does not allow you to send your report onward to QA if there are any buttons showing bright yellow. Supervisors are exempt from this restriction, and supervisors may grant individual employees the same exemption. It's important to remember that the PCR's coloration is based strictly on state reporting requirements. Many agencies opt to require much more information from the crew.
Update the Patient and Billing Information
The information in the Patient, Billing, and PMHx pages is carried forward from the patient's previous dispatches. Oftentimes you not need to make any change at all.
If you are sure that the patient has been transported before, but now the patient fields are all blank, it is possible that your dispatcher did not attach the correct patient record. In this situation, call dispatch and ask them to double-check.
When the PMHx has not been reviewed for 60 days or longer, it will light up as required (bright yellow). To satisfy the requirement, review the PMHx information, add whatever details you can, and then save.
If your company collects patient portraits for identity verification, the portrait appears on the Patient page. You can collect a new portrait any time using the camera in your mobile device; just click the "Attach a portrait" button to activate your camera.
Create as Many Procedure Records as Needed
As shown in the diagram, the PCR-Assess, PCR-Vitals, PCR-Procedure, PCR-IV, PCR-Meds, PCR-ECG, PCR-Labs, and PCR-Airway buttons all work the same: Create as many entries of each as needed to document the service you performed. There is no limit on any of them, so you performed three IV attempts and then pushed five medications, then create three IV records and five Meds records. Each time you push the IV (or whichever) button, AngelTrack presents a blank form which will create a new IV (or whichever) record.
For the administration of medications, including oxygen, you do NOT need to create a PCR-Procedure record for it. AngelTrack will emit a matching PCR-Procedure record automatically for any PCR-Medication record that you document as Disposition = Administered.
Some vitals and assessment fields are pre-filled
Once you save your first set of vitals, all subsequent sets will be partially filled-out using values from the first set. Likewise with additional assessments, once the first assessment is recorded. This will save you some typing and moussing for values that are unlikely to change during the brief interval of a transport. It's important that while the fields might be auto-filled, they must be carefully reviewed; AngelTrack is not a certified crew member, it can only assist you in completing your report. Each time a crew member completes their report, they are verifying that all of the information is correct.
This feature can be disabled on a per-employee basis. Ask your supervisor.
Loading the assessment from the patient's previous transport
The Assessment form features red and blue ↯ lightning bolt icons, if you wish to fetch the patient's physical or mental assessment from the last time they were transported. The blue ↯ retrieves the assessment from the patient's last non-emergent transport, while the red ↯ retrieves from the last emergent transport. The lightning bolts do not appear unless the relevant data is available.
Reviewing, editing, and deleting
To review the records created so far, press the Review button. A list of all created records is shown, in the order they were performed (not necessarily the order the records were created). Click on any one of them to open a summary panel.
From the summary panel you can check what values were set, or click "Edit" to return to the full form to make changes. Values AngelTrack believes are abnormal are highlighted in yellow and red, as shown below. These highlights are simply to provide visual assistance in identifying potential issues or typos, they are not intended as nor should be construed as medical advice.

Click the "Delete" button to remove the record from your report. Deleted records are not really erased; instead they are simply hidden, no longer appearing in the final report used by QA and Billing. You can delete and un-delete records at will with no consequences.
Using the Physical Exam Body-Map
The lower half of the PCR Assessment page contains the body-map for recording your exam findings:

Click any area of the body-map to record a new finding in that area. Click any red finding icon to edit or delete it. You can also delete findings by clicking the ✘ marks in the findings chart at the right.
Use drag-and-drop to precisely reposition your findings
AngelTrack will arrange your findings in their approximate body areas. If you wish to arrange them more precisely, simply drag and drop the finding icons as you see fit.
The web browsers in many mobile devices do not support the HTML5 drag-and-drop functionality. You can nevertheless still click the body-map to add new findings, and click existing findings to edit or delete them. If you wish to arrange them more precisely, then use a different web browser -- or a full-sized computer back at the station -- to drag and drop them as necessary.
Using the PCR AI Assistant to Fill Out Forms
If your agency has an AngelTrack add-on license for the PCR Assistant AI, then the PCR can dictate your voice directly into the various PCR forms. This might be easier and more relaxing than keypunch, especially on a touch-screen device where you are stuck doing a lot of pinch-and-zoom navigation.
To learn more, please visit the PCR Assistant AI Guide.
Import ECG Data from a Monitor
If you have a ZOLL X-Series monitor, or a LIFEPAK monitor (Stryker / Medtronic / Physio-Control), or a Philips Tempus Pro monitor, AngelTrack can fetch its data from the cloud, and fill out your vital-signs and ECG records for you.
To learn how to do this with a ZOLL X-series monitor, look at the ZOLL C2C Integration Guide.
To learn how to do this with a LIFEPAK monitor, look at the Stryker LIFENET / LIFEPAK Integration Guide.
To learn how to do this with a Philips Tempus Pro monitor, look at the Philips Corsium Integration Guide.
Fill Out the Injury and Arrest Reports If Needed
The two buttons named Injury and Arrest are forms that you will fill out only when applicable. Unlike the procedures buttons, there is only a single copy of the Injury form and a single copy of the Arrest form. Therefore, pressing the button opens the existing form whether or not it has already been filled out.
Depending on the initial complaint given by the caller, AngelTrack will occasionally light up the Injury button, indicating that the injury report is suggested or required. For example, if the caller requested EMS service for bleeding, the injury button will change to Injury , indicating that the injury report is suggested. However, if you are dispatched for a fall or other anticipated injury, the button will change to Injury , indicating that the injury report is required, even if there is no information to report.
Likewise the Arrest report will be suggested when you are dispatched for an overdose, but will be required when dispatched for chest pain or if the attending gives an arrest-related impression on the patient assessment.
Complete the Followup Data
Every single call will require at least some followup information -- even if all you have to report is a patient refusal. The followup information also includes leg times and odometer readings, so if you missed any of those during the call, you can edit them later.

Provide reasons for delays in order to pass QA on the first attempt
When any of your leg times are unusually long, they will be highlighted in yellow, along with the necessary "Reason for delay" field. To remove the yellow highlighting, provide the reason for the delay.
Changing the times / Editing a response time
The PCR's Followup page is where you can view and modify all of your leg times, including your response time.
You must wait until the call has been closed by your dispatcher, before you can edit any of those timestamps.
If you are using AngelTrack from the dispatcher side, you can find a link to the Followup page at the top of the Dispatch Edit page.
Collect Signatures
Most transports will require at least one signature -- during patient dropoff. When you press the Signatures button, AngelTrack will select and open the signature form it believes is most likely to be the one needed... but you can select whichever combination of forms is correct.
AngelTrack has internal rules about the minimum required signatures for different services provided. Read the Signatures guide to learn more.
If you attach a "Auth/XFer signatures" document to the dispatch, then it counts as both the "Payment authorization" and the "Receiving facility" signature forms.
You can capture signatures without having a signal on your mobile device. Simply wait to click "Save" until you step outside and get a signal... or use the Offline PCR. To learn more about using AngelTrack with a poor signal or no signal, visit the No Signal Guide.
Crew Roles / Designating a Driver and Attending
On the Crew tab of the PCR, you can check and adjust the designations of driver, on-scene attending, transport driver, transport attending, and other roles.
AngelTrack will initially auto-set them for you, by observing which crew member performs the progress-button punches, which crew member first opens the PCR, and which crew member performs the patient care procedures. This auto-determination is not perfect, and so you must verify the designations before completing your report.
Trauma Tags / Patient Armbands
If you place a trauma tag on the patient's wrist, record its number in the first slot of the "External reports" section of the PCR's Hospital form.
The PCR's attached patient record also has a "Barcode" field, but this is a permanent field that stays with the patient record into future trips. It is intended to hold an armband number issued by the patient's nursing home or hospice. It is not suitable for trauma-tag use because state trauma registries want a separate trauma tag number for each incident, even if it's the same patient as before.
Write the Narrative
For best results, use AutoCompose after you've completely filled out everything else in the PCR, including the followup data. AutoCompose uses data from dispatch and from the PCR, so the more data you provide ahead of time, the more detail will appear in the composition.
AutoCompose writes (or rewrites) the whole narrative from start to finish. If you modify the narrative, and add details, your work will be lost if you AutoCompose again.
Spend time adding detail
AutoCompose is driven by PCR and dispatch data, and so it will forever be limited to writing generic narratives. It is up to you to fill in pertinent details about the patient's condition, about the need for transport, and about the need for the treatment available at your destination.
Your supervisors have reports showing how much detail you add to your AutoCompose'd narratives. Your supervisors can revoke your access to AutoCompose.
S.O.A.P. notes for Telemedicine
When performing a telemedicine call, the narrative textbox changes to a four-section SOAP-notes form, and AutoCompose is not available.
Changing the AutoCompose layout
AutoCompose runs from a template that your supervisors control. If you do not like the layout of the composed narrative, or if you wish to add boilerplate text, ask a supervisor to modify the respective document template, found under AngelTrack's Settings page.
Thresholds for abnormal vital signs
AutoCompose will describe abnormal vital signs as "mild" or "severe" according to the thresholds agreed at the N.A.E.M.S.P.'s "Meeting of Eagles." It is not intended as medical advice.
The same thresholds are used in the PCR to set red / orange / green warning colors on patient vital signs.
Transcribing audio
If you prefer to dictate your narrative into a microphone instead of typing, AngelTrack can transcribe your audio for you. Simply click the "Transcribe Audio" button and upload your voice recording. AngelTrack will use AI to transcribe your voice, and append the new text to the end of your current narrative. Please carefully check over the results to insure that AngelTrack understood everything you said.
The AI transcriber is limited to 16MB input files, so for a very long narrative, you might need to transcribe it in two segments.
Attach Documents by Photographing or Scanning
Your company policy will dictate which paper documents should be scanned in to AngelTrack versus which should be physically sent in to headquarters. Usually, only PCS documents must be physically preserved. Be sure you are familiar with your company's document policy; it may be posted as a permanent announcement in AngelTrack.
In any case, once you've identified which paper documents should be uploaded, it's a simple process. You can use a flatbed scanner back at the station (scan to JPG, then upload the JPG to AngelTrack) or you can simply photograph the documents using your mobile device's built-in camera. AngelTrack will convert all incoming documents (other than ECG strips) to greyscale for faster downloading and printing.
Document photography works on practically all mobile devices with modern web browsers. When you press the "Select files for attach" button on AngelTrack's web page, your mobile device will prompt you to use an existing photo (from your photo album) or to take a new one. You can upload as many at a time as you wish.
For more help scanning and uploading documents, read the Document Uploads guide.
Review Patient History
All of the patient's prior BLS+ transports appear in the History list. Click the "Report…" link to open that call's completed run report. When enroute to an unfamiliar patient, it may be worthwhile to review the patient's previous treatments.
Review Company Protocol
If your agency has posted its medical protocol document online, this button can be clicked to view it. The document will load in a separate tab.
Your supervisors also have the option to divide your protocol document into sections, and upload it into AngelTrack's sectioned protocol viewer. The sectioned protocol viewer is pre-loaded with the entire content (all 61 sections) of the NASEMSO Model EMS Clinical Guidelines. It is up to your supervisors to adapt and expand the model protocol to meet local guidelines.
How to record which protocol sections authorized your patient care
To indicate which protocol sections you applied during patient care, use the Authorization input fields on the following PCR pages:
- PCR-ECG
- PCR-Medication
- PCR-IV
- PCR-Procedure
- PCR-Airway
Each of those pages has a protocol-section picker that you can use to specify which section of your protocol authorized your actions, including an adult/child selector.
Using the PCR Without a Wifi Signal
For each PCR page, you must save your work before leaving, or else your work will be lost. Pressing the "Save" button uploads your work to the AngelTrack server.
If you are in a confined or remote area and cannot get a wifi signal, then you may need to wait for later before saving. In such cases you can still work on your report, and save after you've gotten the signal back. If you know in advance that you will be losing your wifi signal, then open several different tabs -- perhaps an Assess, a Vitals, a Patient, a Signatures, and a Narrative -- before entering the confined area. Switch between tabs as needed. Then later, when you have a signal again, save and close each tab.
If you know in advance that you will be losing signal for a long time, then switch to the Offline PCR. In it, you can do all basic charting, and then finish up your reports later when you have a signal again. For more advice on how to use AngelTrack without a wifi signal, read the No Signal guide.
Submit the Completed Report to QA
When all recordkeeping is finished, press the Submit to QA button to send the report onward.

If there is anything unusual about the call or about your report, use the "Dialog with the QA reviewer" textbox to explain it to the QA reviewer in advance. That can save you an unnecessary QA failure (when the QA reviewer sends it back to you for an explanation).
Non-BLS calls are automatically sent to QA
For Car, Wheelchair Van, and Gurney transports that are not reportable to the state trauma registry, AngelTrack will automatically complete the report and send it to QA when all of the following are provided by the crew:
- reasonable leg times (meaning: you pressed the progress button at the correct times);
- odometer readings consistent with the travel time; and
- all necessary signatures (the PCR's Signatures page automatically opens whichever signature form is probably needed).
Consequently, a wheelchair driver completes progress button presses, odometer readings, and signatures, will never need to manually complete a report or send it to QA; AngelTrack will do it all automatically.
Completeness Grades
AngelTrack grades the completeness of your PCR records, counting the number of datafields you leave blank. Most datafields allow this. It is very typical to have incomplete fields; your agency's policy on incomplete fields will vary. It is up to your supervisors to determine what is acceptable.
The purpose of the completeness grades is to calculate an average over time. Across hundreds of calls, it is typically expected to fill out 90% of the PCR. AngelTrack offers reports to your supervisor showing how well you meet this standard. AngelTrack also calculates how much detail you tend to add to your auto-composed narratives.
The completeness grades for each call are shown in the PCR Review page, as percentages. A graph of your average completeness grades over time is available on your Employee Self-Edit page (click on your initials) on the "Statistics" tab.
Email Out a Copy of the Report
You can email out a copy of your run report right from the PCR, in any state of completeness. Just click the "Email" button on the PCR ribbon to access the email menu.
AngelTrack will send the email on your behalf, using its HIPAA-compliant email service MailGun. You do not need to have email service configured on your mobile device.
You can choose to send to the patient (if their email address is recorded), or to the origin facility (if a dispatcher has input their email address into their facility record in AngelTrack), or to the destination facility (if likewise configured). If the PCR says that no recipient has an email address configured, then edit the patient and add their email address, or call dispatch and ask them to update the attached facility records.
HIPAA consent
If the recipient's email provider is not HIPAA-compliant (and few are), then the recipient must give consent to receive PHI data in that inbox. The PCR will prompt you to obtain this consent when you hit the send button.
Whenever you use the PCR to send email, the activity is logged in the journal of the associated dispatch. The email sent will also contain your name, and the attached PDF of the run report will show it was you who generated it.
Fax Out a Copy of the Report
You can use the Print popover menu to fax out the entire run report, right to an ER or to a nurses' station or to a family member. The ER dropoff report is a super-compact summary containing only the most pertinent information.
This requires fax-over-IP or VoIP software on your mobile device. The software must interact with the mobile device so as to be available for opening .PDF documents, as that is what AngelTrack will send when you click the aforementioned buttons. Here is an example of the RingCentral VOIP app receiving an AngelTrack report .PDF for faxing:

On iOS devices, you must click "Open in..." to activate your fax-over-internet app.
There are many fax-over-IP and VoIP apps to keep track of, so AngelTrack LLC does not vet any apps or guarantee combability. Luckily many of them are free or nearly-free. You may need to try several until you find one that works well with your particular mobile device.
Correct a Failed Report
If QA fails your report, it will reappear on your list of reports waiting. Use the PCR in the usual way to add and edit information in order to resolve QA's objections.

During QA review, your QA reviewer will note their objections in a list. The list is then shown to you on the PCR home page (the page you see when first entering the PCR). For each item in the list, take care to either address the objection or else provide an explanation in the "Dialog with the QA reviewer" textbox.
When all corrections and explanations are finished, send the report back to QA by pressing the Submit to QA button in the usual way.